Few words in this one, mostly just photos of the finished lute.
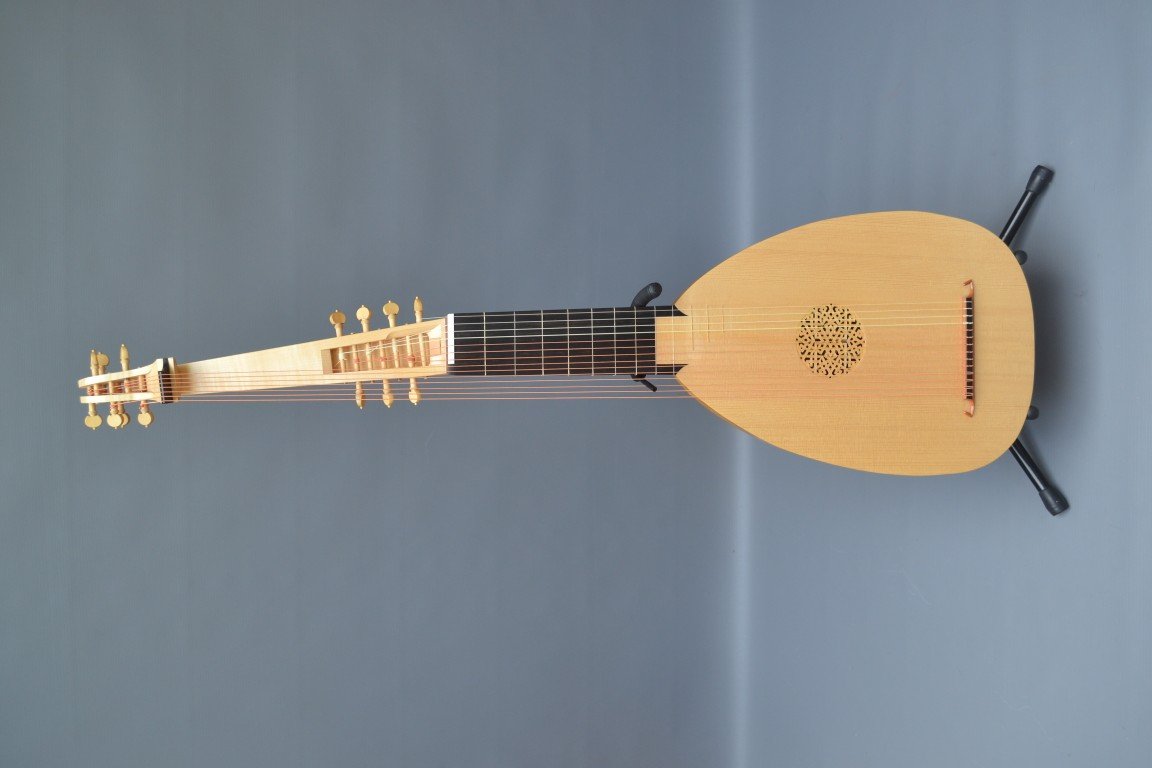
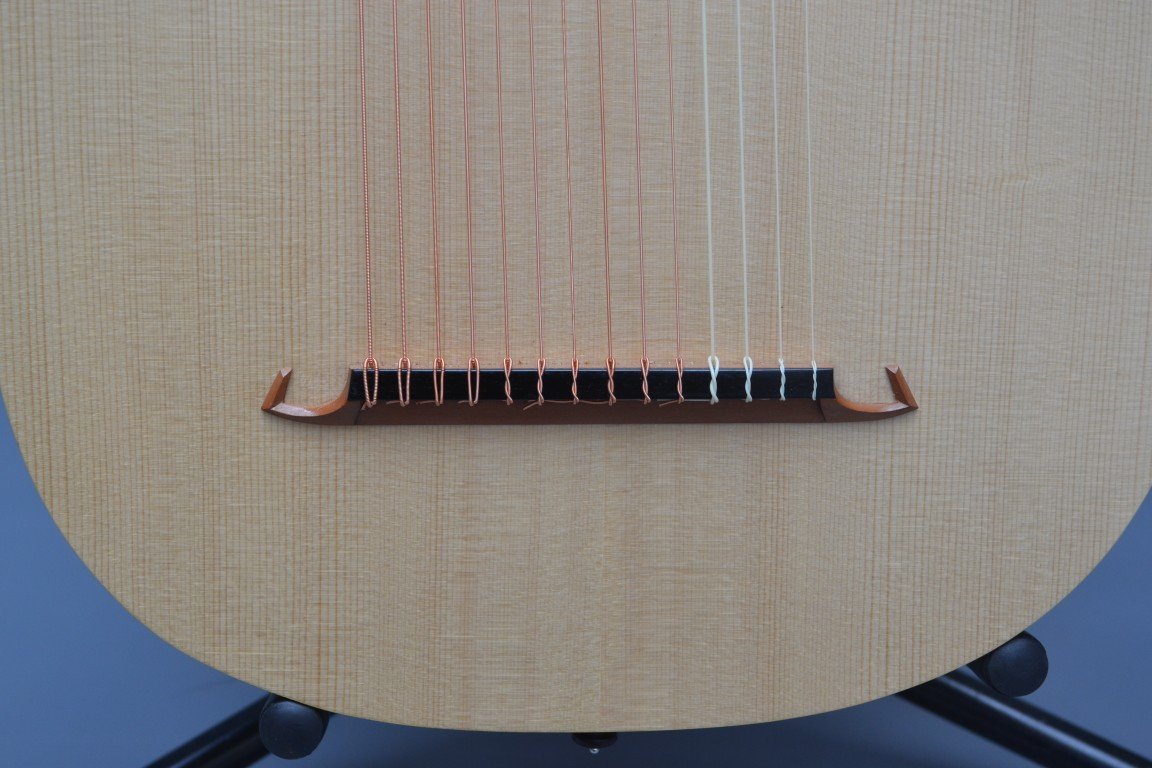
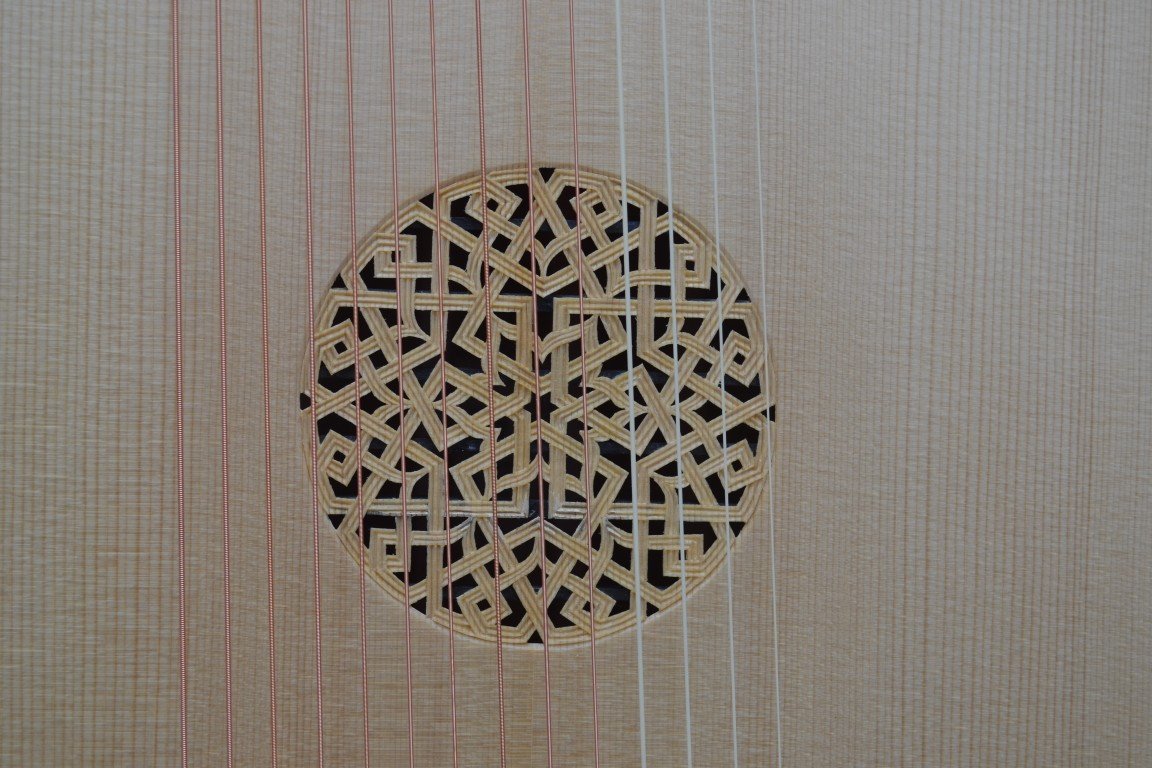
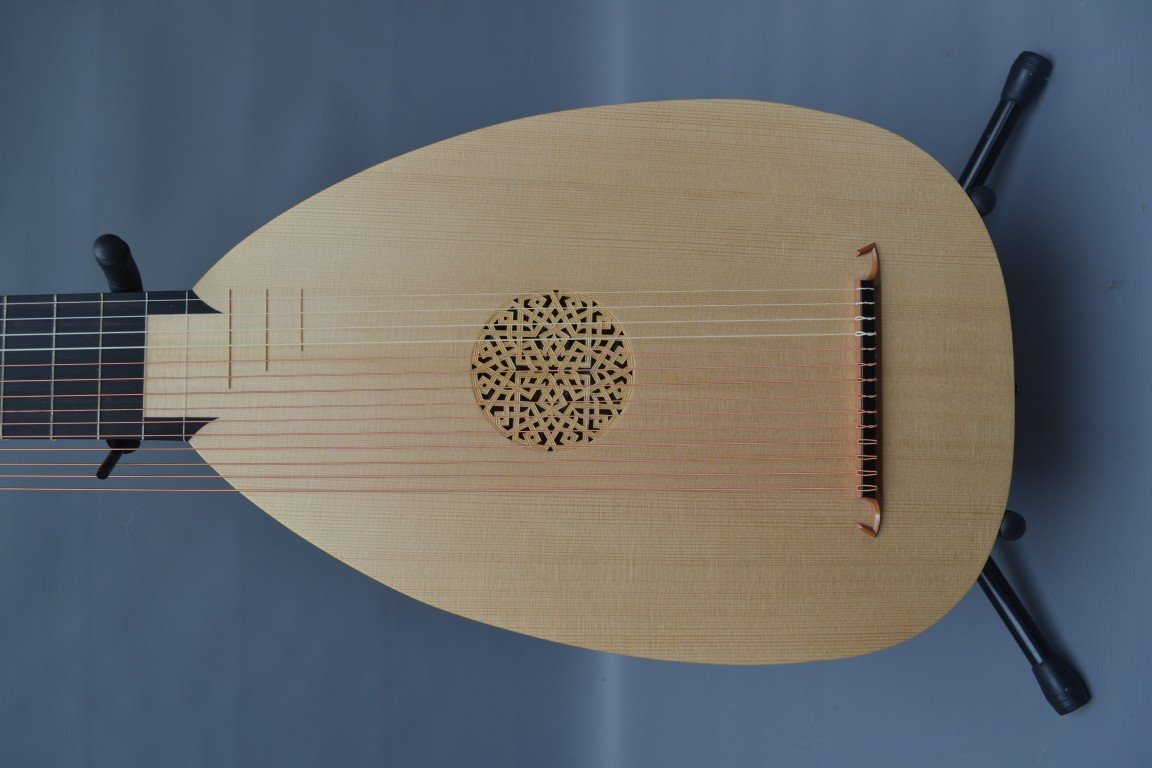
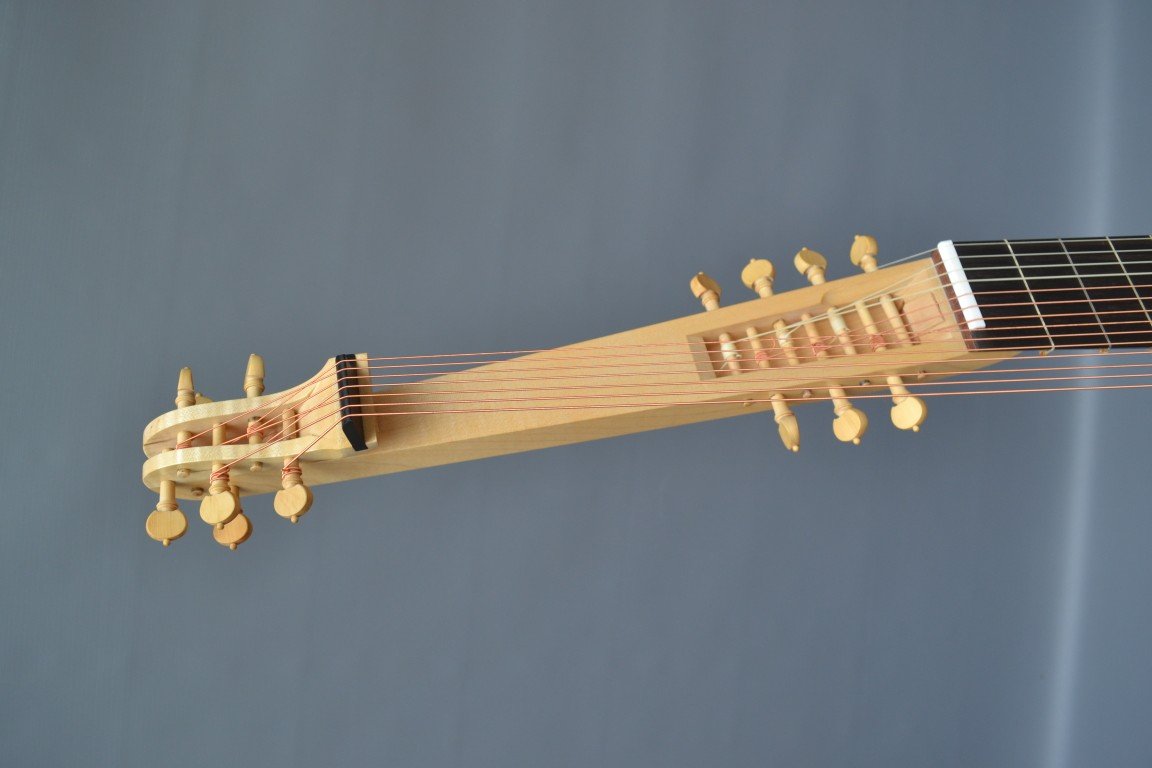
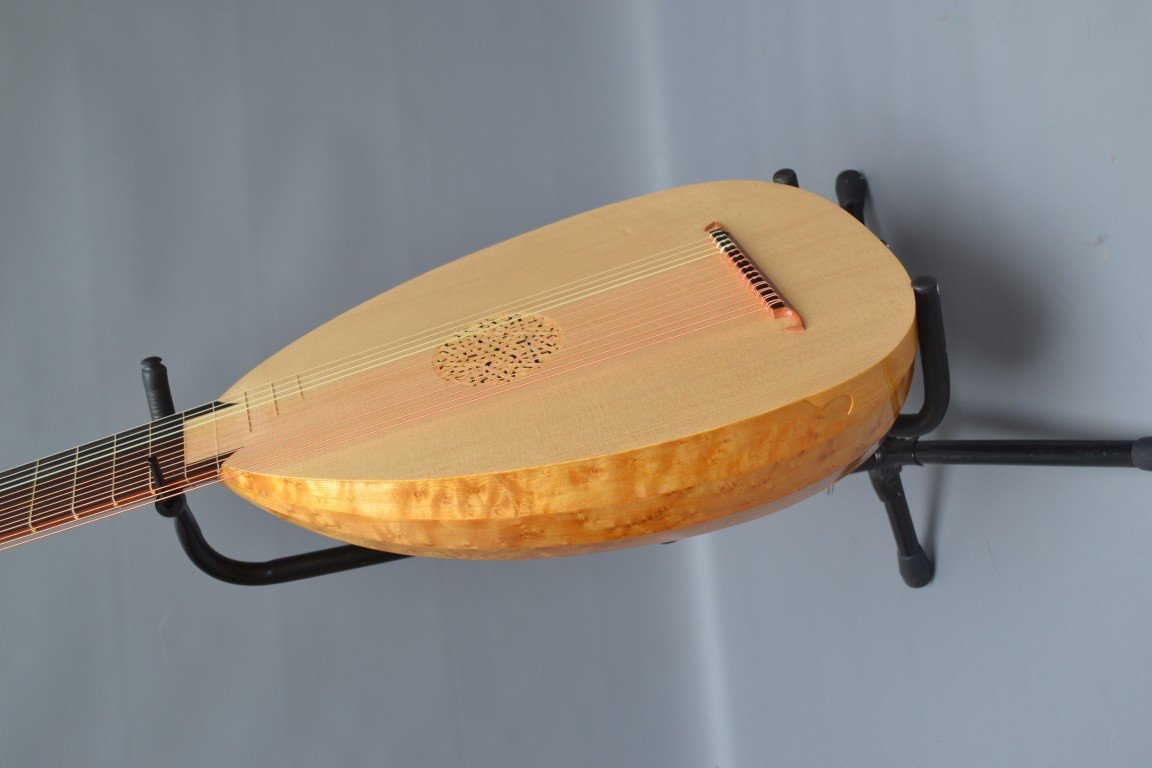
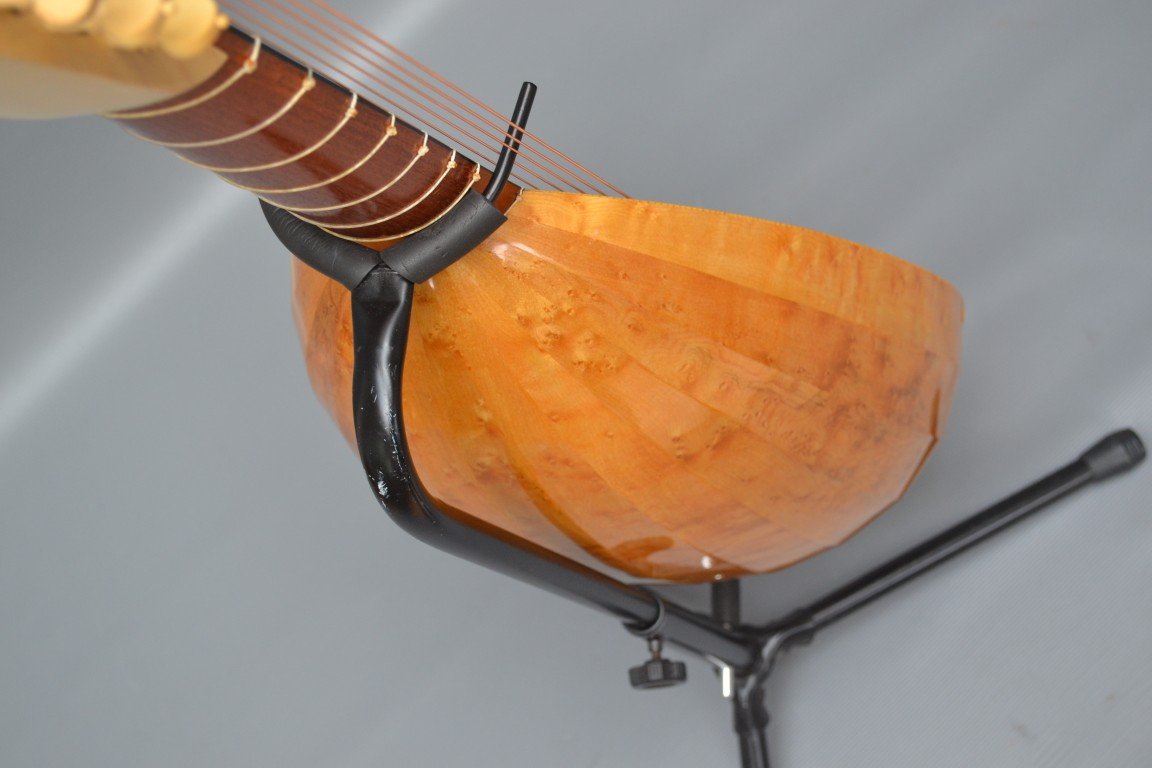
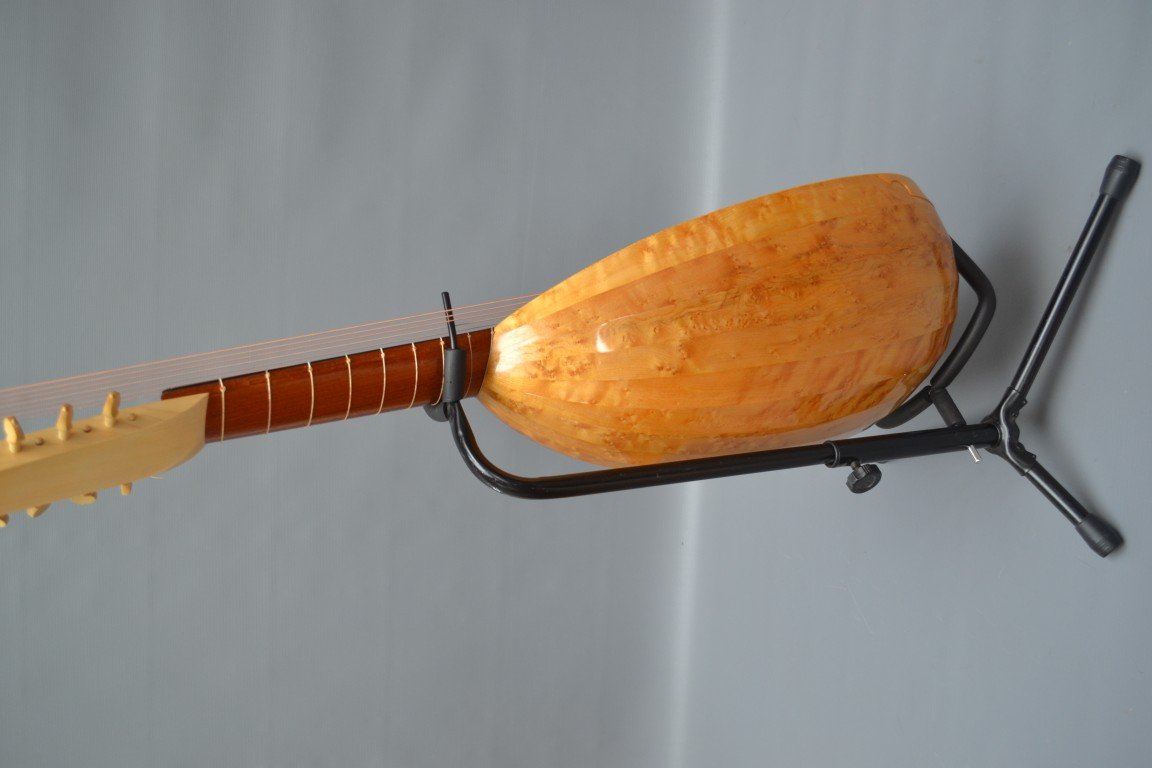
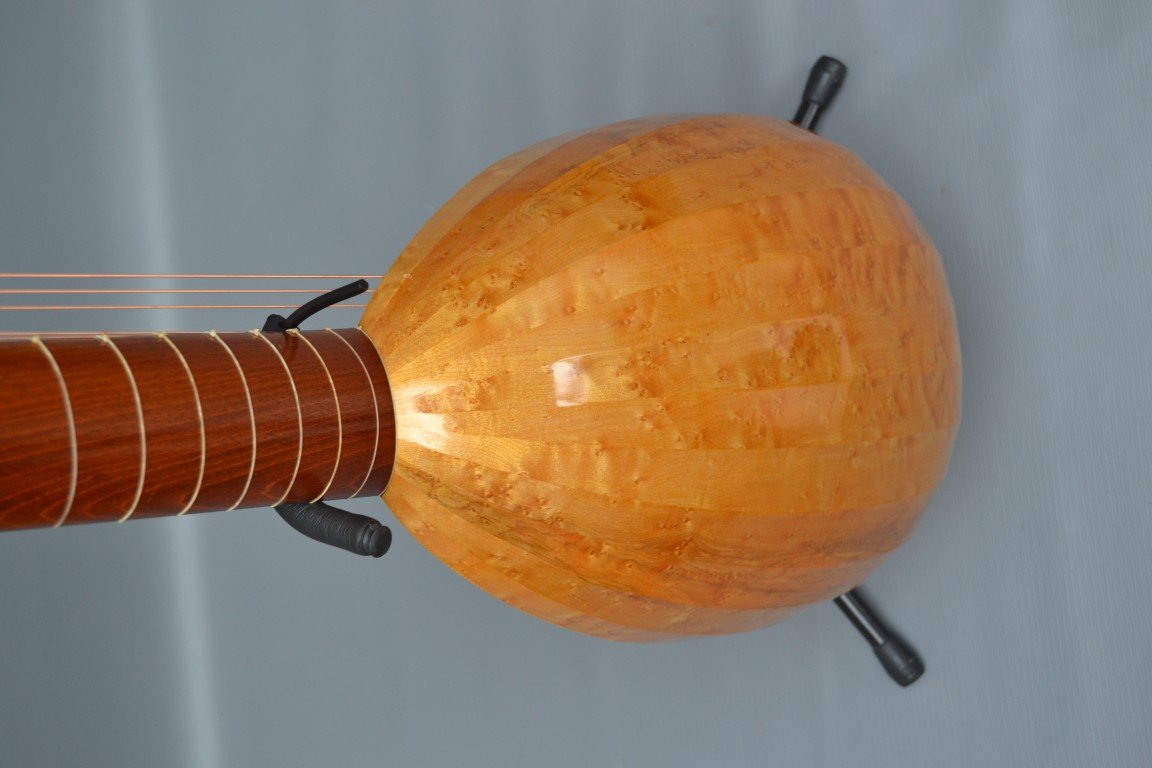
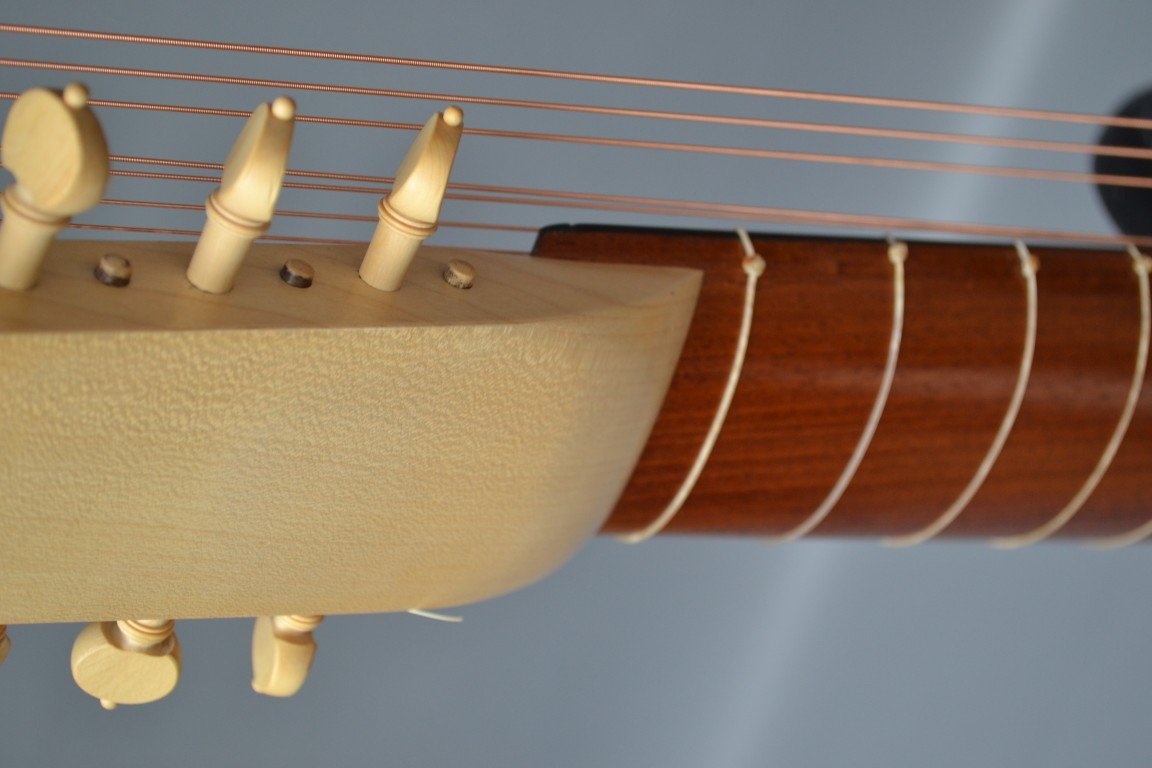
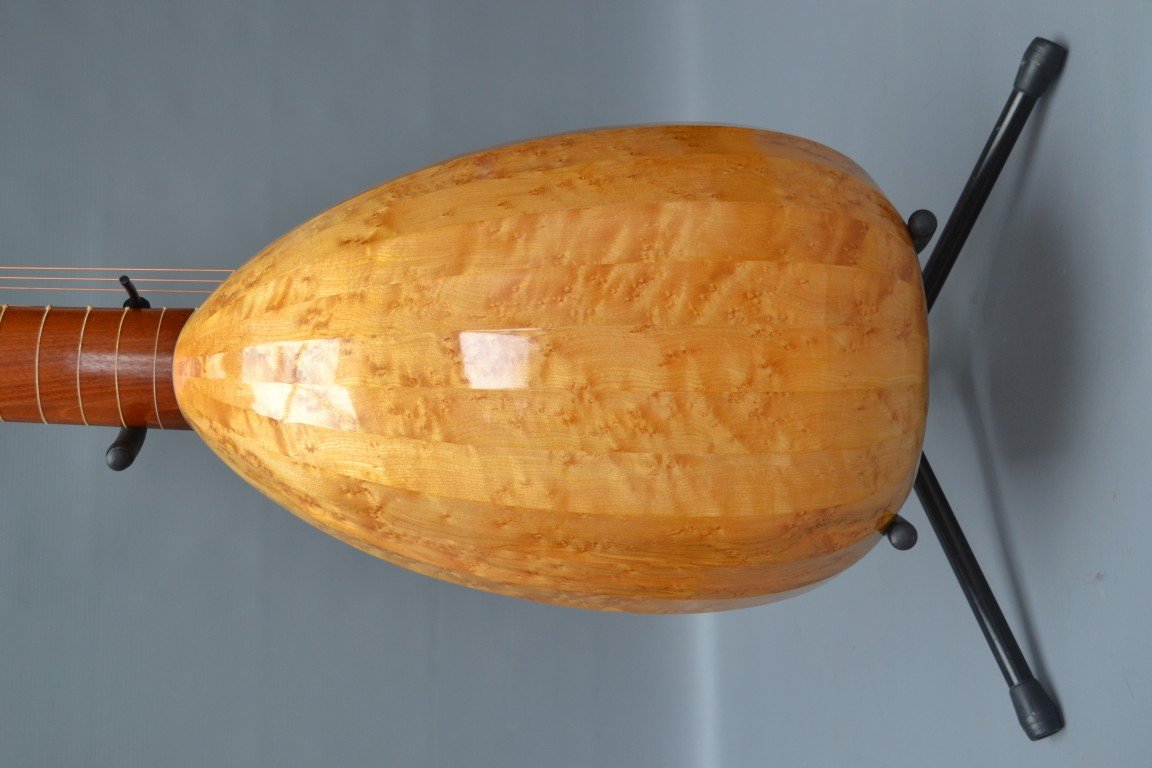
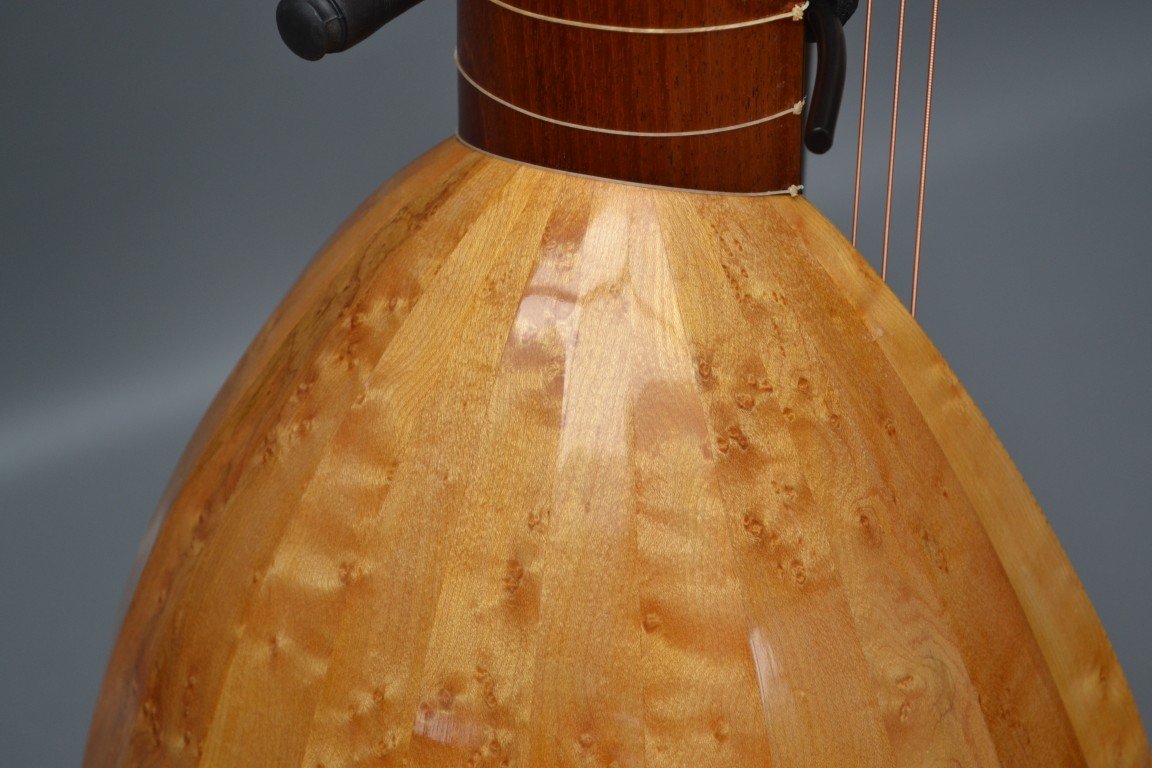
Before applying any finish, the lute was strung up and checked out (as far as possible without any frets). Everything seemed to be in order, and tonally it was sounding very promising on the open strings.
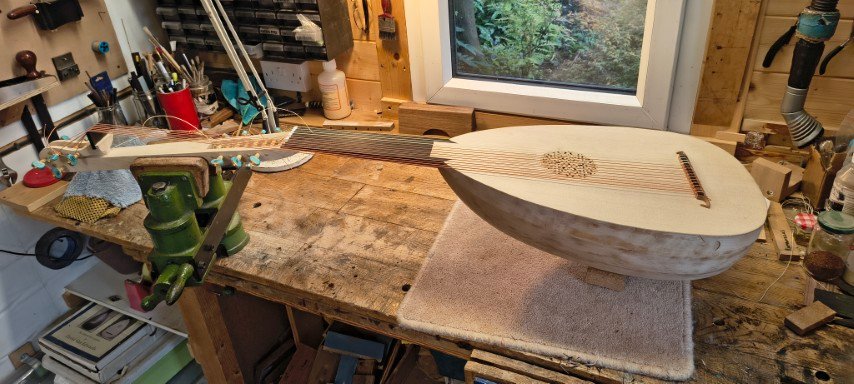
Once the strings are off again, and after a lot of fine scraping and sanding, the first coat of French polish (shellac) is applied to the body. The soundboard and neck will be finished with some light coats of Danish oil.
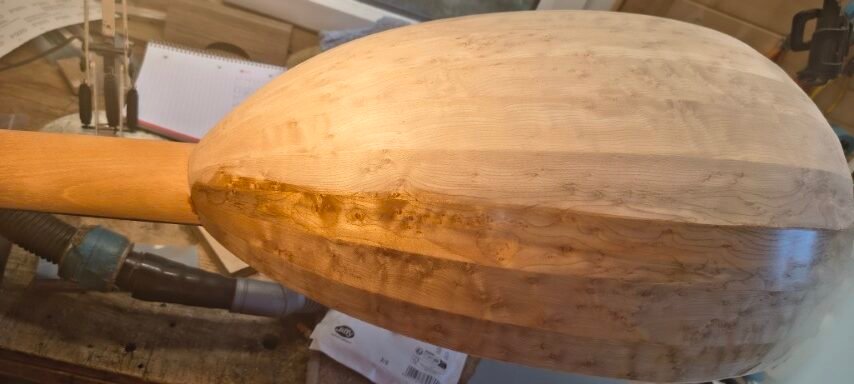
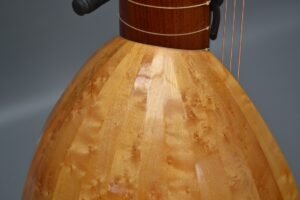
Even just the first coat of shellac brings out the grain of the bird’s-eye maple beautifully.
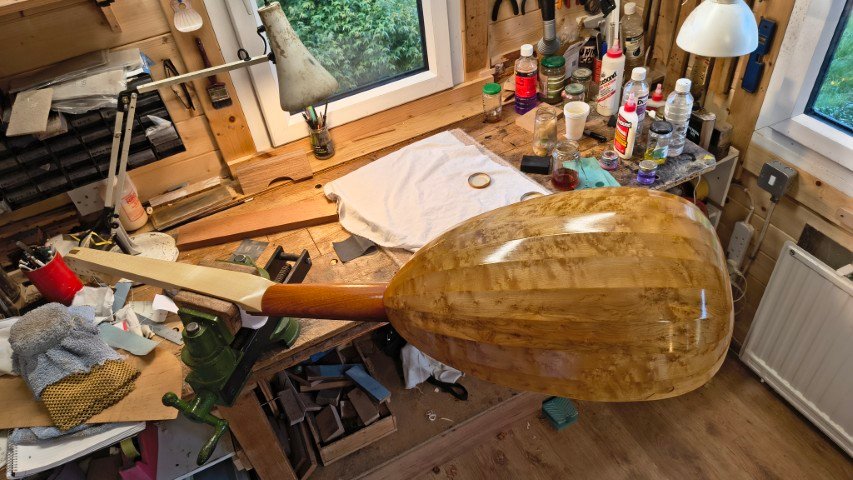
Here a couple of coats of shellac have been applied to the back, and also two coats of Danish oil to the neck and soundboard.
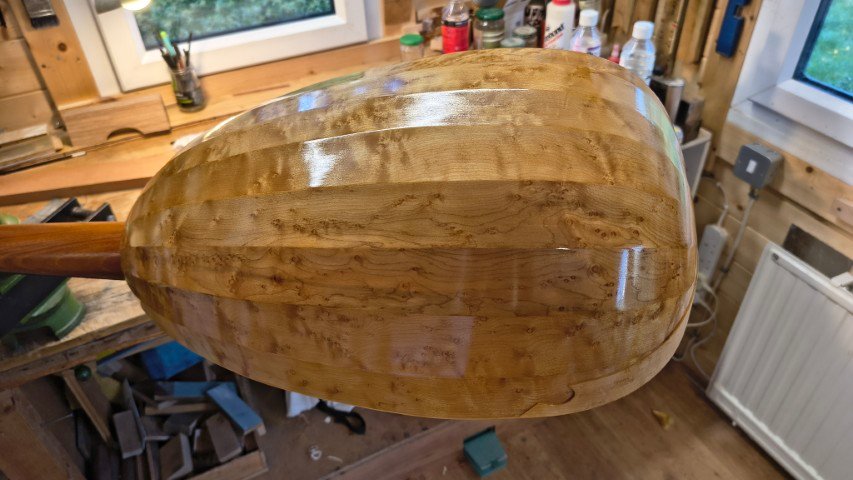
At this stage there is still some structure in the finish. After the final “bodying” session of French polish, the surface will be lightly sanded and then a final coat of thinned Shellac applied to achieve a high gloss finish.
To follow – some photos of the finished lute.
No pictures were taken of the neck being glued to the body. This is because it is a very manual operation. Hide glue is liberally applied to both surfaces (after the end grain is thoroughly sized with thinned glue). The two parts of the joint are then rubbed together, squeezing any excess glue out, until the join starts to grab. At this point the neck needs to be accurately positioned, which is done by feel (when the top surface of the neck is flush to the neck block in the body), and visually by aligning pencil lines marked on the same two surfaces. The two parts are then just held in position until secure, and then the assembly is left propped upright while the glue dries fully.
Next step is gluing on the soundboard. As with most of the lute, hot hide glue is used, and this allows relatively easy removal of the top in the future if repairs are needed.
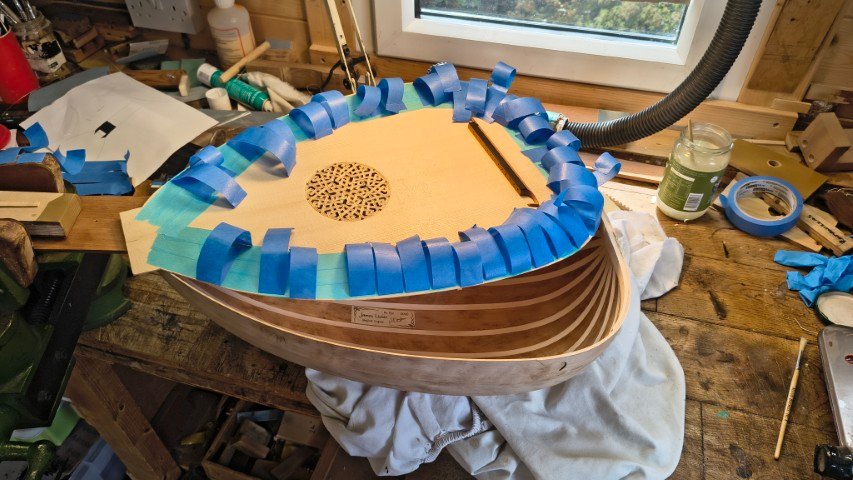
The top is quite thin and delicate, so I used low tack masking tape to cover the outer area of the top. Stronger, high tack tape is then used to hold the soundboard down to the sides while the glue dries. Having most of the pieces of tape in position before starting makes the gluing operation quick. Although hide glue can be reactivated with heat, I prefer to have it all securely glued in one go.
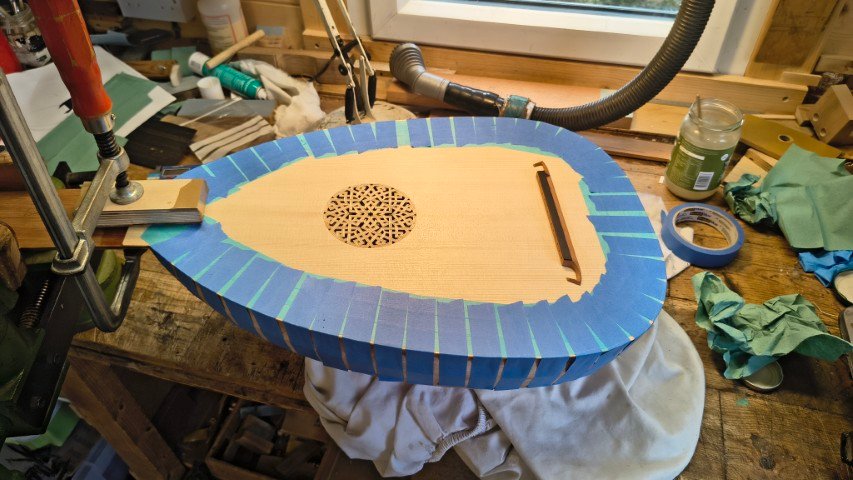
All taped down. Next the fingerboard is prepared and glued to the neck, along with the decorative “beards” that extend onto the soundboard.
Final assembly task is gluing the neck extension to the neck.
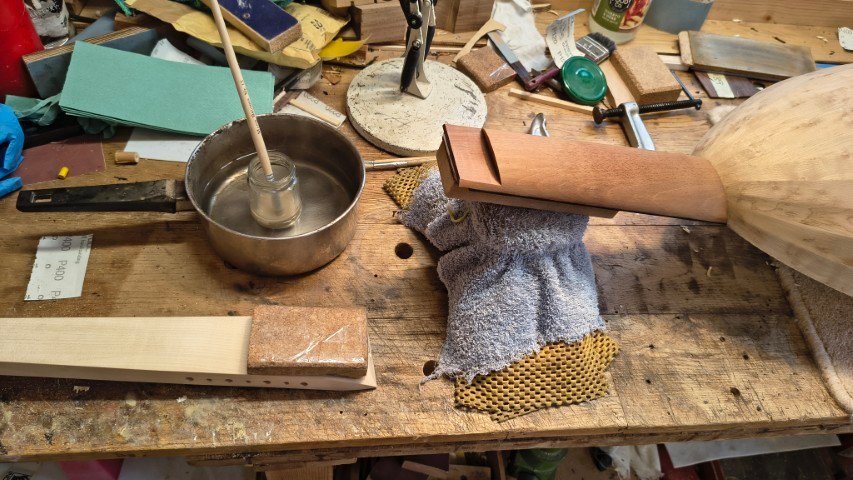
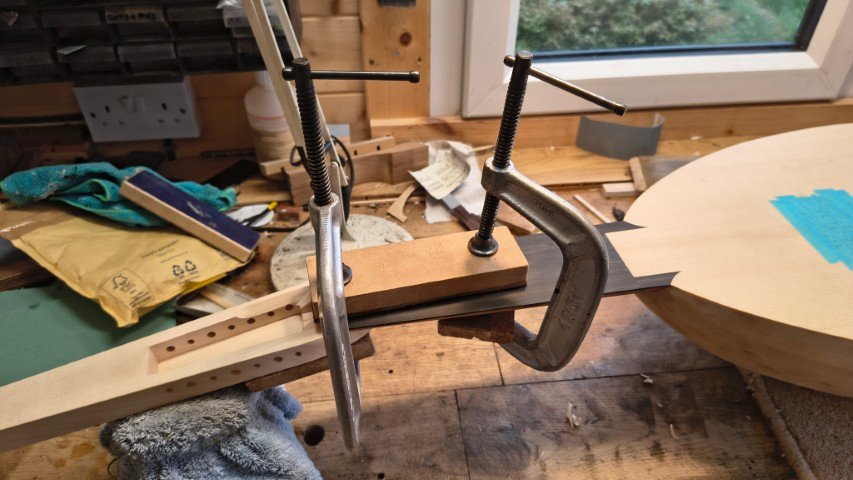
For the neck extension much the same procedure is used as for gluing the neck to the body, but in this case clamps can be used to hold the joint in position.Both neck joints are secured with a screw, but as some recent repair jobs have demonstrated, it’s the glue joint that is critical, and the screw merely stops the neck falling off if the glue joint fails!
Next time – finishing!
Archlutes can have bass string lengths of 1.4m, but this lute has a relatively modest 960mm, and the short (fingerboard) scale length is 640mm.
In these images the gluing surfaces have been planed perfectly flat, and the screw holes can be seen in both the neck and the neck block in the body. The initial shaping of the neck has been started by planing two facets into the neck blank.
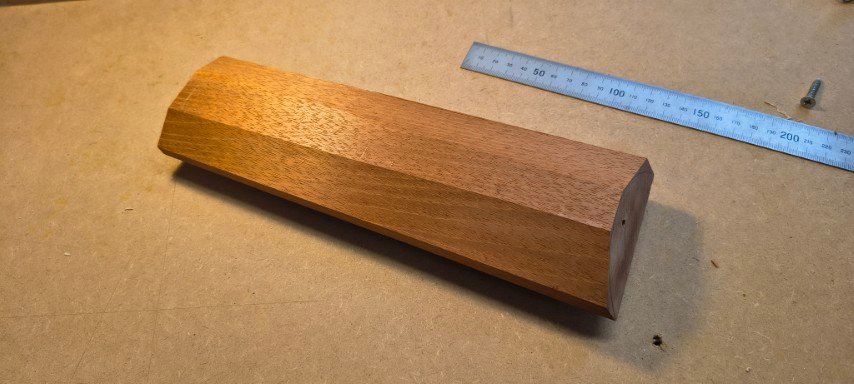
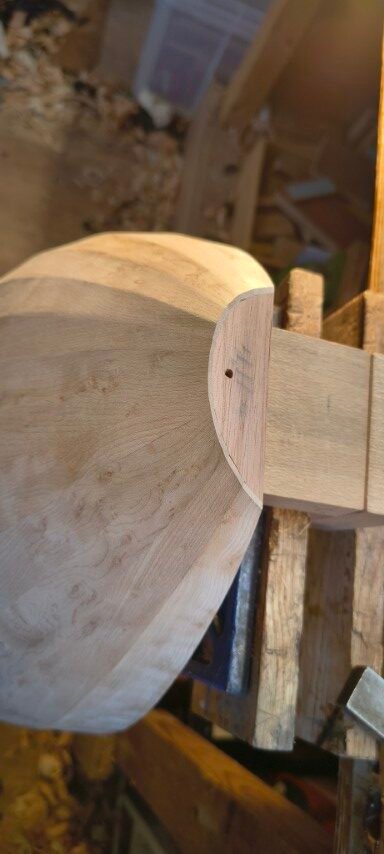
The neck is made from some really nice mahogany that I recovered from a door I found in a skip a few years ago. Here the shaping of the neck is complete. A block of wood has been temporarily screwed to the neck to aid clamping while the shaping is done.
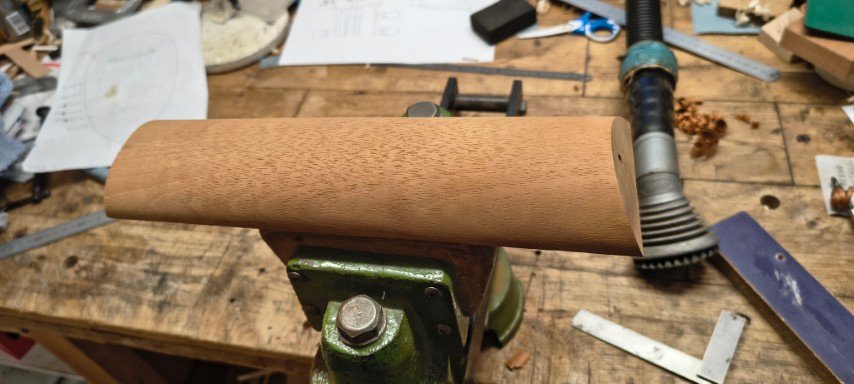
Although screws are used in the joint, the gluing is critical. Hide glue is used, and the end-grain of the neck needs to be sized with thin glue before gluing the two parts together. I’ve done a few repairs recently where this joint has failed, and although the screw stops the neck coming away completely, once the glue joint has failed there is enough movement that the neck pulls up under string tension, and the lute becomes unplayable. It is therefore really important to do this job well!
The extension is maple, and here the block that forms the extension peg box is being glued. As this archlute has only 14 strings rather than the traditional 27, the peg box doesn’t have to be as large.
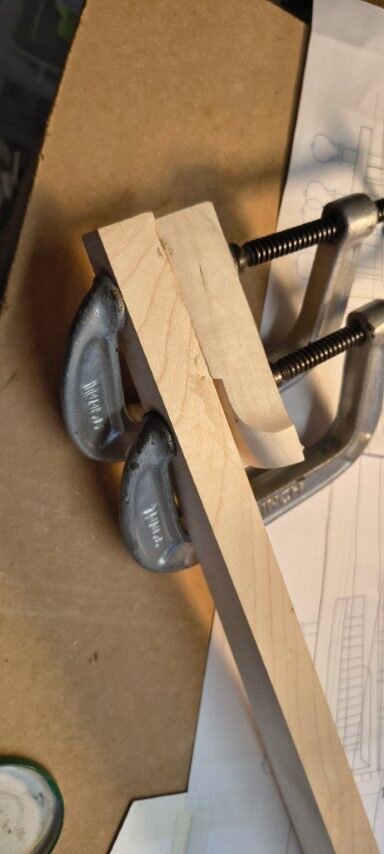
Here most of the carving of the peg boxes is complete, but the peg holes have yet to be drilled and reamed.
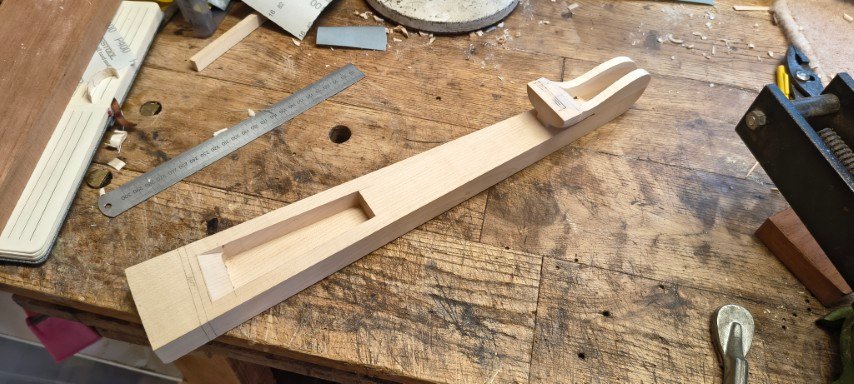
As with the neck to body joint, the joint between the neck and the extension is glued and screwed in the traditional way.
Next post will see the soundboard, body and neck assembled.


Less than a month to the inaugural Felixstowe Classical Guitar Festival. This new festival has an impressive line-up of performers, and is unique (in the UK at least) in have competitions for both composers and luthiers. I’ll be one of the judges for the luthiery competition, and Steve Goss is hosting the composition competition.
The luthiers competition is a VERY rare opportunity, and as entries have so far been lower than expected, we’ve decided to open it up to luthiers outside the UK. The competition is open to amateurs, professionals and students this year, so there’s no excuse not to enter, and it’s an excellent opportunity particularly for students and amateurs to get some valuable feedback from professional players and luthiers.
More information on the website here: https://felixstoweclassicalguitarfestival.co.uk/
Hope to see you there!
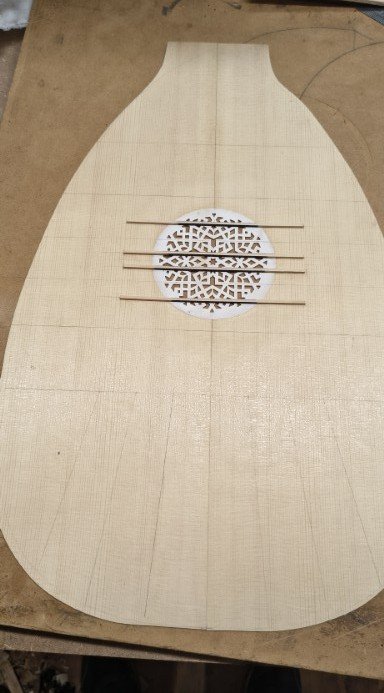
The bracing of this lute was a little different to traditional instruments, with a combination of ladder braces and fan braces in the bridge area.
First braces to go on are the small rose support bars. The purpose of these is just to support the very delicately carved rose, where the soundboard thickness is only about 1.4mm
The remaining braces glued on:
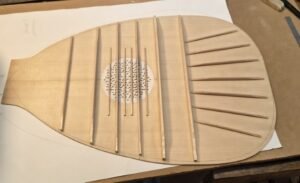
The bridge is made from pear wood, with an ebony cap:
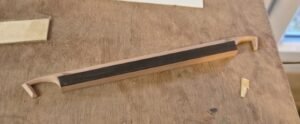
Gluing the bridge. Unlike a guitar, the bridge is glued before the top is glued to the body. Here I’m using my “go-bar” deck. A very traditional method of clamping dating back to the 17th Century, but here using modern rubber-tipped fibreglass bars, rather than wooden ones.
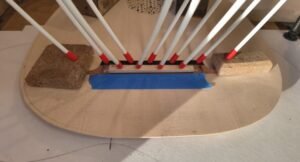
Next post will cover the neck and neck extension.

As is the case with guitars, the soundboard is the most critical part of the instrument in terms of sound production. The wood should be quarter-sawn and free of defects, and ideally have no run-out. This is even more critical for the lute, as the glued contact area of the bridge is relatively small, and short grain will significantly weaken the join. In the image below, the two halves of the soundboard have been joined, and you can see a band of light in the lower half, which is reflected from a strip light. If the wood was short grain, there would be a step in this band where the join is.
You can also see the design of the rose in the form of a printout glued to the soundboard. This acts as a guide for the initial cutting out.

The next 4 images show the cutting out process. I made 2 very fine chisels just for this process – one straight and one slightly curved. It’s a very delicate process, requiring very sharp tools, a steady hand, and good lighting (and for me, my highest magnification glasses!)


The next stage is the trickiest – carving the channels into the surface of the rose. I modified my carving knife for this job to have a finer tip, and made the edge as sharp as possible.


The finished rose was not quite perfect, but I was very happy with it for my first attempt.

Next up – soundboard bracing and the bridge.

Having built 150+ guitars over the years, I’ve been wanting to try something a little different, and thought lute making would be enough of a challenge, without being too far out of my comfort zone.
Last month I completed my first lute, an archlute, and delivered it to a happy customer. In this short series of posts I’ll document some of the details of the build, and some photos of the finished lute.
The customer was particularly interested in a Liuto Forte type instrument, having seen and heard a number of these played. The lute would therefore have single string courses rather than a combination of unison and octave pairs, and would be braced slightly differently to a traditional lute. Apart from this, the build would be largely traditional, and the only obvious difference externally the smaller number of strings and pegs.
The design was initially based on a Martinus Harz 675mm scale archlute, but with a number of modifications made to suit the different stringing. Most obvious externally is the shorter length of the bass strings which would be 960mm rather than the original 1440mm.
The bowl of the lute would have 13 ribs of bird’s-eye maple. I had an old set of maple back and sides originally cut for a viola de gamba, and there was just enough wood to make the ribs for the bowl. The wood was nicely aged (bought from Paul Fischer some years ago), and had very nice figure.
The first job was to build the mould for the bowl, and produce templates for the ribs. For the construction I largely followed instructions from David van Edwards’ lute building course, but the project would have certainly been much more difficult without the invaluable advice from my friend, ex-teacher, and gifted luthier Tony Johnson.
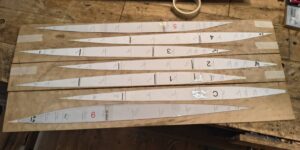
The paper templates are shown taped to the maple pieces before cutting out. It turned out there was a problem with the templates. I’m not sure whether the problem was with the software I used to generate them, or something I did, but fortunately I cut them with enough to spare that I was able to adjust them to fit.
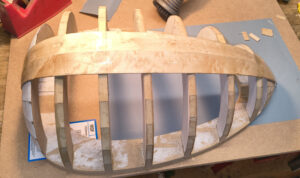
The body mold with the first two ribs glued together. This first joint went fairly quickly, but some of them took quite a while to get perfect. Hot hide glue is used for joining the ribs, which allows any slight errors to be corrected relatively easily.
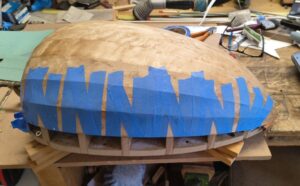
Somewhat later in the process – the penultimate rib on one side, held in place with masking tape while the glue dries.
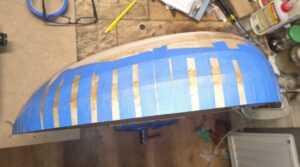
The last rib taped in place. The last rib on each size is left slightly oversize, and trimmed down later before the soundboard is glued on.
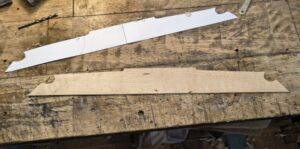
The end clasp before bending. Tricky to get a good fit to the ribs on the end of the lute body, as it curves in two directions.
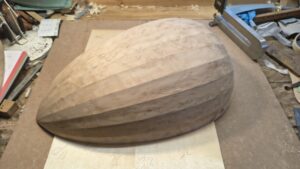
The completed bowl. There were a few imperfect joins, which were easily fixed by heating, applying more hide glue, and taping up again to close any gaps, or to get the ribs level. Once complete, the joins are reinforced with tape glued over them on the inside.
Next installment – starting on the soundboard!

At the end of June this year I had my last day at Newark College. I had been teaching guitar making and repairs at Newark for over 20 years, but recent events have resulted in a high risk that the guitar making course (along with violin, woodwind and piano courses) will close down. The teaching staff put a huge amount of work into trying to ensure the courses continue, and efforts are being made to find alternative ways to run the courses under challenging financial restraints.
It was a difficult decision to make, and I have always enjoying teaching the wonderful students we’ve had at Newark over the years. Sadly, the amount of stress involved in coordinating a course with (at best) patchy support from college management was just too much to be sustainable, whilst trying to run my own guitar making and repair business at the same time.

Someone recently reminded me of a video I created some years ago, so I thought I’d share it here. I can’t claim that I always get a scraper working this well, but it’s very satisfying when it happens!

Finally, after quite a long wait, my repair book has been published! The book took nearly two years to write, and covers a wide range of maintenance and repair work for acoustic (steel-string and classical) guitars. 270 pages with over 600 images covering everything from string changing through setup to replacing a soundboard.
It is available through the publishers Crowood Press, but I’m hoping to also have it available through this website soon.
Here’s the link to the publisher’s website: The Guitar Repair Book – The Crowood Press
Unfortunately the publishers don’t ship outside the UK, but there are a number of online book retailers that do. Here are just a couple:

The traditional classical rosette consists of a number of components inlaid into the soundboard around the soundhole. The rosette in the image below has a central “end grain” pattern, a number of veneer lines, and two lines of half-herringbone (or rope). Some luthiers construct the whole rosette on a jig, and then inlay it into the soundboard in one piece, but in the method described here, each component is inlaid separately, starting with the end-grain pattern in the centre of the rosette.
The end grain pattern is made up of 1mm square strips of different coloured wood glued together to form a pattern. In more detailed rosettes, 0.6mm (or thinner) veneers are used to create a finer pattern, but much more work is involved in making these. The 1mm strips are glued together in two stages to form a “log”, from which individual “tiles” will be cut, and inlaid into the soundboard.

The pattern consists of tiles of 3 x 4 1mm squares. First glue together each row of 4 lines. The lines need to be at least 300mm long. Use two 300mm rulers (covered with tape and/or paper to protect them from the glue) to hold the lines together, with some masking tape across them to secure them until the glue dries (about 30 minutes should be enough). When dry, scrape off any excess glue before gluing the 3 pieces together to form the log. Make sure that the pieces are glued together in the right order, and that they are aligned accurately. It may help to make a small jig to keep the pieces aligned while they are being glued.Leave the log to dry overnight.
Now the log must be cut into tiles, each approximately 2.5mm thick. Use a fine-toothed saw, and a jig to help keep the cuts square, and all the tiles the same thickness. Store the tiles safely until you are ready to inlay them into the soundboard.
Either side of the end grain pattern, and at either edge of the rosette, there are groups of 5 veneer lines. You can choose different colours for these lines, but try to choose colours that will work with the overall design of the guitar – i.e. matching any veneers used in the head, and the top purflings. It is easier to inlay the veneer lines if they are glued together in pairs or threes. Individual lines are quite fragile, but any more than 3 or 4 will be difficult to bend. As there are 5 lines in each group, it is best to glue them up as a pair and a group of 3. Glue together strips that are about 25mm wide, and 400mm long. When dry, you can cut strips off to the required width of 2.5mm. Use the bending iron to bend the glued together veneer lines into circles approximately the right diameter for their positions in the rosette.

The final component to make is the half herringbone (or rope). These are made up from 0.6mm veneers, and again you can choose the colours/woods you use.
You will be using the herringbone-making jig is, which is designed to produce a length of herringbone sufficient to go all the way round the rosette without any joins, which makes the process much simpler. To do this you need to use the full length of the jig.

Glue up veneers of the colours you have chosen in the correct sequence. The strips should be 30mm wide, and the total length needs to be about 1m (this can be made up of 2 or 3 shorter lengths). Use the Blue Titebond glue, which has slightly better heat resistance when bending.

When the glue has dried, trim the strips to 25-28mm in width. The strips should then be cut into short lengths – these should be cut as accurately square and to the same length as possible. The exact length will depend on the angle you want for the herringbone, and the number of veneers (colours) you have used, but it should be somewhere around 30-35mm. If all the pieces are not accurately the same length, then any shorter pieces won’t be held tightly enough, and you will have gaps in the finished herringbone.
Next set the width of the herringbone jig. The exact width depends on the length you have cut the strips to, and the angle for the herringbone, but it should be around 8mm to 12mm. Remember that the shallower the angle used (i.e. the smaller the gap), the easier it will be to bend the herringbone without it breaking. Make sure the jig is set so that the gap is the same along the whole length.
You now need two wedges to hold the herringbone in place at the ends of the jig. The wedges need made to fit snugly in the gap in the jig, and the angle should be set to match the angle required for the herringbone.
Put the first wedge in one end of the jig – clamp it in position if necessary.

Push the first piece of the herringbone tight up against the wedge, then apply glue to one surface of the next piece. Push the glued side hard up against the first piece. Each piece needs to be pushed very firmly against the last piece, so that there are no gaps.
Repeat until all the pieces are used, or until you reach the other end of the jig.
Push the second wedge hard up against the last piece of the herringbone, and clamp it in position if necessary.
You should NOT need to clamp across the jig. This is not necessary if you have made all the pieces the same length, and pushed each piece tight up against the last. Clamping across the jig risks breaking it!

Leave for the glue to dry overnight.
When dry, carefully remove from the jig. Clean up the edges with a plane – the strip should still be about 25mm wide.
Now carefull plane down one surface of the herringbone until it is perfectly flat and square. You can easily see if the surface is off square, as the joins between the different colours will not be square with the edges.
When you’re happy with this side, you then need to plane, sand and/or scrape the other side down to reach the desired thickness. If you still have 5mm or more, it’s probably worth trimming it back on the bandsaw first, or even cutting it into two pieces if it’s thick enough. The final thickness should be about 2.5mm. Concentrate on getting the same thickness over the whole length and width of the herringbone.

Now you can cut the herringbone into 2.5mm thick strips to inlay into the soundboard.

Take great care when bending the herringbone strips as it’s very easy to break them! In general, if you make the herrigbone with a very low angle (say 10 – 15 degrees), it is much less likely to break when bending than if the angle is higher (30 – 40 degrees).

You should now have all the components you need for the rosette.
It is a good idea to clamp the soundboard to a thick, flat backing board, and to keep it clamped to this board until the rosette is complete. Drill a ¼” hole in the backing board for the circle cutter pin. Align this hole with the hole in the soundboard, put the pin in to hold it in position, then clamp the end of the soundboard using 2 clamps and a flat caul.
The first part to be inlaid will be the end grain tiles. First calculate the radius of the inner edge of the end grain pattern. On the Torres drawing, this is 11.5mm from the inner edge of the rosette. You need to add to this the soundhole radius (43mm) and the gap between the edge of the soundhole and the rosette (3mm). Mark this distance (57.5mm) from the centre of the soundhole , on the centreline of the soundboard where it will be covered by the fingerboard.
Set the circle cutter to this radius, making sure that the bevel of the blade is towards the waste side of the cut. The blade will need to be reversed to make the cut for the outer edge of the channel, as shown below:

The circle cutter blade should protrude by 2.0mm from the base of the circle cutter. The first cut should be made very lightly, with just enough pressure to cut the fibres on the surface of the soundboard. Progressively cut deeper until you reach the maximum depth (2.0mm).
If the blade is sharp enough, you should be able to get a clean cut all the way round in one direction, but it is sometimes safer to only cut in the direction of the grain. To do this, you need to divide the circle into 4 quadrants, and make four separate cuts for each edge, and in the directions shown in the diagram below.

Now mark the width of the end grain tiles from the edge you have just cut, again on the centre line where it will be covered by the fingerboard. You can use this area to make test cuts to get the width of the channel exactly right before taking the cut all the way around. Cut to the full depth for a short distance from the centre join, and remove the waste material from between the two cuts using a chisel or hand router. Take one of the tiles and test the fit in the channel. If it is too tight or loose, adjust the circle cutter radius as necessary, and make another short cut. Test fit with the tile again. You should have space in the area that will be covered by the fingerboard to make 4 test cuts. When you are happy that the fit is perfect, continue the cut right around, again starting with a very light cut, and progressing slowly up to the maximum depth.
A hand router is the ideal tool for removing the waste material from the channel, but a chisel can be used. Take care not to cut too deeply, or to cut into the edges of the channel. Try to cut with the grain so as not to tear out at the bottom of the channel. The depth of the channel should be a shade less than 2mm – if you try to go down to the same depth as the circle cutter blade setting, it will be difficult to remove the waste material at the corners. The depth should be a minimum of 1.5mm.
For larger sized tiles, it is a good idea to start inlaying them at the centre join of the soundboard at the bottom of the rosette, so that the rosette pattern is symmetrical, but with the small tiles used for this design, it is less important. If you have enough tiles, you can inlay them all the way around the channel, but it is not essential to put tiles in the area that will be covered by the fingerboard. Apply glue into the channel, and start inlaying the tiles, making sure they are pushed together tightly, so that there are no gaps. When all the tiles have been glued in, leave overnight for the glue to dry.
Once fully dry, plane and/or scrape the tiles down flush with the soundboard. This will be easier if all the tiles were cut to exactly the same thickness. If using a plane, make sure it is sharp, and set fairly fine, as you will be planing across end grain, and there is a risk of pulling tiles out if the plane is blunt or set too coarsely. Finish with a sanding block if necessary.
The next components to inlay are the veneer lines. Set the circle cutter diameter so that it just touches the outside edge of the end grain tiles, making sure that the bevel of the blade is on the waste side (away from the tiles). The depth should still be 2mm. Cut all the way around, starting with a very light cut as before. Mark the other side of the channel at the correct width for the 5 veneer lines, which should be about 3mm, but check with the actual components. Reverse the circle cutter blade so that the bevel is on the waste side for the second cut. As before, you can use the area that will be covered by the fingerboard to make a test cut to check the fit of the 5 veneer lines (one piece with 2 veneers, and one with 3). The fit should be snug, with no gaps, but not so tight that it will be difficult to fit the veneers into the channel when the glue has been applied.
Once you are happy with the fit, continue the cut all the way round. Remove the waste with a chisel or hand router to just under 2mm depth. Test fit the veneer lines in the channel, and trim them to the correct length. If they are a bit too tight, you can compress the veneer lines slightly with a burnisher (or a pasta-maker if you have one!). This will help them fit more easily, and they will expand again to fit the channel when the glue is applied.
Apply glue all the way around the channel, and use a small brush to work the glue into the corners. Do NOT apply glue to the veneers – it is not necessary, and will make it harder to fit them into the channel. Insert the veneer lines into the channel, making sure they are pushed down fully. Leave to dry overnight.
When dry, plane and scrape the veneer lines flush with the soundboard. Now repeat the process for the veneer lines on the other side of the end grain tiles. The remaining channels can be cut 2 at a time, so next you can cut both channels for the half-herringbone. Use the area under the fingerboard for test cuts again, and glued the herringbone components into the channels.
The final two sets of veneer lines will form the outer and inner edges of the final rosette, so it is important to make these cuts as cleanly as possible. Make sure the circle cutter blade is sharp, and make these final cuts very carefully, cutting with the grain of the soundboard, in quadrants as shown in the diagram above. Once the final components have been inlaid, and the glue is dry, plane, scrape and sand the rosette flush with the soundboard. After final sanding, the edges should be clean and sharp, with no evidence of dried glue on the soundboard or the rosette.
Now sand the whole top surface of the soundboard. Before starting to thickness the soundboard, you should check that there are no tears, plane marks or other imperfections in the top surface that would need to be sanded out later.

I spent last weekend in Birmingham at the Royal Birmingham Conservatoire Guitar Festival hosted by Mark Ashford. The event combined concerts, masterclasses and workshops, and I took two guitars to exhibit, and a handful of students from Newark College, who had their own stand to exhibit their guitars and promote the guitar making course at Newark.


Concerts included performances by David Russel, Miloš Karadaglić and the Vida Guitar Quartet. It’s often difficult to get to see concerts at these events, as you’re busy manning your exhibition stand, but I did see the Miloš Karadaglić and Vida Guitar Quartet concert, and most of David Russell’s masterclass.
The students from Newark enjoyed the event, and I think gained a lot from the experience. One of the highlights for them was having both David Russell and Miloš Karadaglić play their guitars, give them some feedback and talk to them about all things classical guitar. David Russell showed the students his Dammann guitar, and other guitars he owns (including a recent spruce double-top guitar made by a former student of Newark College, Dennis Tolz).
I had just 2 guitars with me, the satinwood guitar featured in my previous blog post, and my “experimental” guitar with the wacky headstock, which I’ve brought out of retirement as I don’t have any other guitars available to exhibit at the moment.

The experimental guitar always attracts a lot of interest, but players tend to be put off by the fact that it takes about 45 minutes to change the strings, and you can’t use a standard set, as the 3rd string needs to be much longer than a standard string. There was a lot of admiration for the satinwood guitar as well, but no buyers as yet (which is fine with me for now, as I have a few more exhibitions I want to take it to this year before selling it.)


Now that the new year has arrived, my thoughts turn to what exhibitions I will be attending this year. Actually, I’ve been thinking about this for several months now, and in particular, what my exhibition guitar will be this year.
In recent years there has been an increasing amount of interest in shorter scale length guitars, and although I have built quite a few, they have all been commissions, so I have never had one available to show customers. So one decision was made – it would be a short scale guitar.
Next decision – exactly what scale length? Last year I received a commission for a guitar with a scale length of 613.5mm (this may sound like an odd number, but it’s simply a 650mm scale length minus the first fret, which means you can use a standard 650mm jig for marking/cutting the fret slots). I was slightly nervous about this guitar, as it was the shortest scale I had made. As it turned out, the guitar worked really well, with a very sweet tone, and no obvious loss of volume. In the end I decided not to go quite that short with the exhibition guitar, and settled on a scale length of 628mm.
I then needed to decide what tonewood to use for the back and sides (like the vast majority of my guitars, the top would be European spruce.) Looking through my stock I came across a very nice set of satinwood which I bought years ago, and was just waiting for the right guitar to use it on, and this was the one.
Everything else was fairly standard, although the body size was made slightly smaller to match the shorter scale. I glued the bridge on yesterday, and the strings will probably go on tomorrow. In the meantime, here are a few photos to whet your appetite…


First exhibition will be Craig Ogden’s Guitar Weekend, Manchester, 25th – 27th January at The Bridgewater Hall, Manchester. The following weekend Ill be in Birmingham for the Guitar Festival at the Conservatoire.
Later in the year I hope to be at the Classical Guitar Retreat in Scotland, and the West Dean Guitar Festival.
James

What is a tonewood?
A tonewood is any timber that has appropriate acoustic properties for musical instrument making. In terms of tonewoods, by far the most critical part of a guitar is the top (soundboard).
There are a number of properties that a good tonewood should have. It should be stable and well-seasoned, so that no part of the finished guitar will warp or crack. They should have low damping, so that a minimum amount of the energy of the vibrating string is lost to heat. The tonewood used for the soundboard also needs to be light in weight, and cut so that the growth rings are perpendicular to the surface of the wood (quarter-sawn), and the gran runs parallel to the surface (long grain). This will give the top the best stiffness to weight ratio, making it both more responsive and more efficient.

Most (but not all) tops are made from softwoods, and the majority are either spruce or cedar. Cedar is normally said to produce a guitar with a warmer, fuller sound, whereas spruce has good clarity and separation, and some say a more complex tone. As a player, I tend to prefer spruce guitars, as it’s usually possible to get a really warm tone from a good spruce guitar, but more difficult to get clarity from a cedar guitar. Note, however, that the differences are not as dramatic as many think – you might be surprised at how difficult it can be to distinguish a spruce guitar from a cedar guitar in a blind test.

The tonewoods used for the back and sides of the guitar have less effect on the guitar’s tone than the top, but can still be significant. Probably the most common tonewood used is rosewood. Traditionally, Brazilian rosewood was believed to be the best, but many luthiers now prefer Indian rosewood – and not only because of its much lower cost. Indian rosewood is more stable then Brazilian (less prone to cracking) and some luthiers feel it gives the guitar a slightly warmer tonal quality.
An increasing concern is the availability, cost and environmental impact involved in using certain tonewoods, particularly tropical hardwoods. In January 2017, most rosewood species (dalbergia) were listed on Appendix II of CITES (The Convention of International Trade of Endangered Species). Brazilian rosewood (dalbergia nigra) has been listed under the much stricter controls of Appendix I since 1992. As a result, many luthiers are looking at “alternative” tonewoods, and some are offering guitars made with no tropical hardwoods, and/or no CITES listed woods. There are in fact a great number of hardwoods (and some softwoods) that have been used successfully for the backs and sides of classical guitars, and it is not really a significant problem for the luthier. The big issue is convincing players that guitars made from non-tropical woods can be as good as those made from tropical woods. The Leonardo Guitar Research Project has gone some way to demonstrating that few players or listeners can reliably distinguish between tropical and non-tropical guitars in blind tests. The project has also produced a list of luthiers making guitars with non-tropical woods, and the list is growing (Link).

Non-tropical tonewoods that have been successfully used for the back and sides of classical guitars include maple, beech, plane, cherry, walnut and oak, and there are many others. Alternatives can also be found for necks, fingerboards and bridges. I have recently built guitars with back, sides and necks of maple and walnut, fingerboards of bog oak and Rocklite (a sustainable wood-based material), and bridges of walnut and laburnum. Maple is probably my personal favourite tonewood. Bird’s-eye maple is an incredibly beautiful wood (see photo above), and gives the guitar what I describe as a ‘creamy’ tone (if that means anything) with sweet trebles and deep, warm basses.


The struts are lengths of wood glued to the inside of the top (soundboard), which act to support the top against the tension of the strings, and to control the overall sound that the guitar produces. They are usually made of the same material as the top, although often cedar top guitars will have spruce struts.
By far the most common pattern used for the strutting is the fan brace system, so called because the struts are arranged somewhat like the ribs of a fan. The struts all radiate from a single point, usually somewhere around the 12th fret, although this point can vary significantly, making the struts more (or less) parallel to each other.
Before Torres popularised the fan bracing system (contrary to popular myth, he did not invent it) most guitars used a simple “ladder” bracing system – with just a few struts running across the soundboard, i.e. perpendicular to the grain direction.
Although the majority of guitars still use a variation of the fan bracing system, there have been a number of alternatives tried over recent years. Perhaps one of the more radical looking systems was that developed by Michael Kasha and Richard Schneider (see lower image). Dr. Kasha used his scientific training to develop an entirely new system of strutting, and Kasha and Schneider collaborated for many years on this design.

More recently, lattice bracing systems have become more popular, largely as a result of John Williams’ patronage of Greg Smallman guitars. The lattice system employs a number of crossed struts, usually joined at the intersections, to form a “lattice”. This form of strutting is very stiff, and can be made very light, and allows the top be made significantly thinner than on traditionally braced guitars. This can help to improve the efficiency of the instrument in generating sound, which can give the guitar more volume.
Lattice-braced guitars also tend to have a distinctive tone (which is not to everyone’s taste), but this is more a result of the lightness and stiffness of the top than the system of strutting itself.
Radial bracing systems have also been used, where each brace radiates out from the centre of the lower bout. Makers have experimented with other bracing systems, but at the moment variations on the fan bracing or lattice bracing systems are by far the most common.

Just returned from the West Dean Guitar Festival. Had an enjoyable time as always, much of it spent chatting to other luthiers! Highlights were mostly provided by the great Pavel Steidl, who gave a wonderful performance on the Saturday evening, and then tried one of my guitars at the exhibition (a spruce/rosewood guitar), and was very enthusiastic about it!
James

Travelling to Belgium for the Cordefactum Guitar Festival this weekend. I will have 2 guitars with me – one spruce/Indian rosewood, and the other is an all non-tropical woods guitar (walnut/spruce), photo below.
I’m also happy to say that Marcin Dylla will be playing the spruce/maple guitar he has on loan in the Saturday evening concert.
James

An increasingly popular feature on my guitars (and others) is the armrest. Armrests serve two functions – firstly they improve playing comfort for the player, by providing a smoothly curved surface for the right arm to rest on, rather than the edge of the guitar, which is usually only very slightly rounded or beveled. The second function is to help keep the player’s arm off the vibrating area of the soundboard. Many players (myself included) don’t find this to be a problem, but it does depend on the design of the guitar, and on how the player holds the guitar.

It is possible to buy aftermarket armrests which attach to the guitar, usually using suction cups. I don’t recommend these for a number of reasons. Firstly, they tend to be quite bulky, and often are not sufficiently long to allow good movement of the players right arm, which is essential if you want to achieve a range of tones from tasto to ponticello. It can also be difficult to get them to attach well to some finishes, particularly those you normally find on hand-built instruments – i.e. French polish or oil finishes.
I offer two types of armrest with my guitars, one which is permanently glued to the edge of the top of the guitar (pictured), and the other which is held by rare earth magnets, and can be removed when required. The latter is slightly wider as its edge extends slightly beyond the outline of the guitar, but both are long enough to allow a good range of movement of the arm, and also slim enough to look elegant and unobtrusive.

Way back in February I did an interview for Classical Guitar Magazine, and had almost forgotten about it, but it has finally been published in the latest (Fall) issue, featuring Laura Snowden on the cover.

So far I’ve been fairly impressed with the new incarnation of CG magazine. It’s nice to have more colour, and there’s a good range of features and interviews, and even some music to play!
In my interview, I talk about the milestone of reaching my 100th guitar, and about my interest in using non-tropical and sustainable woods in my guitar building.
Here’s the link to where you can view the article: CG Magazine

James